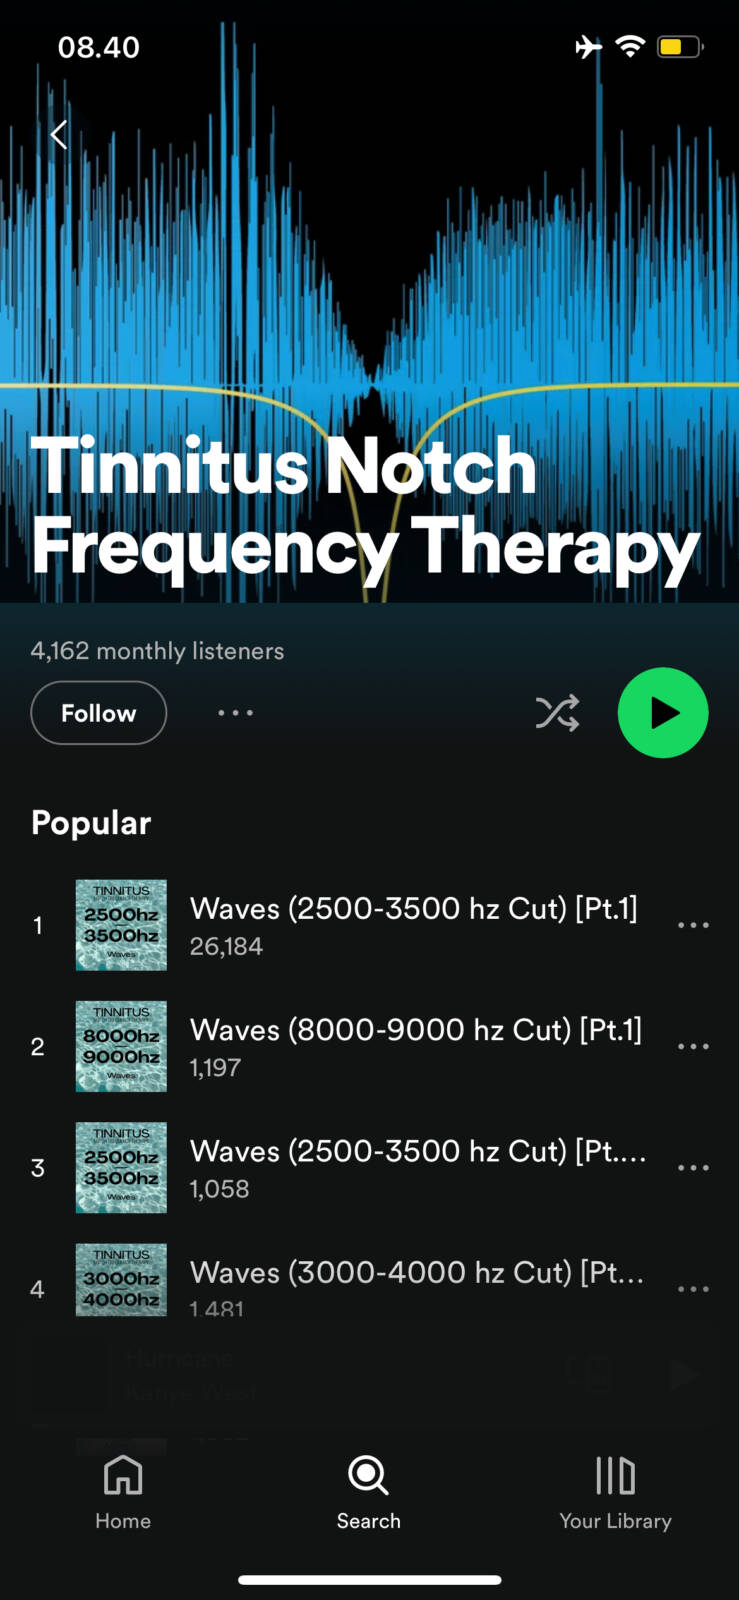
Tinnitus Notch Frequency Therapy Spotify Listening Guide

SAFETY: To get started, you must first have the frequency of your tinnitus professionally measured, and you need to make assessments on a monthly basis to ensure that you are listening to the right therapy.

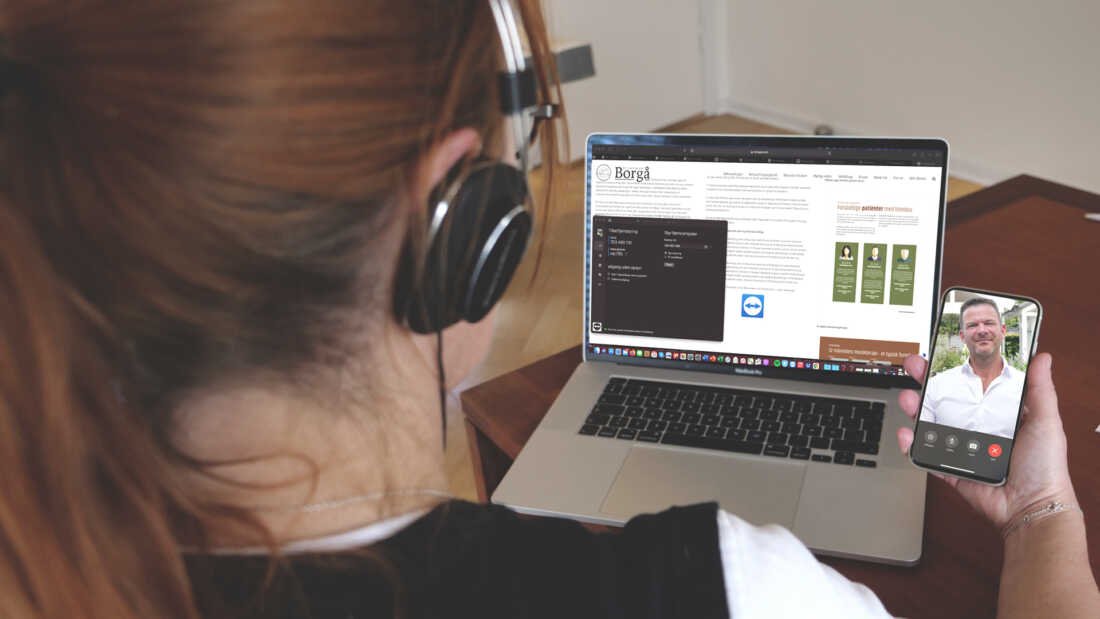
Therefore, we strongly recommend the Notch Frequency Therapy treatment package at the Borgaa Clinic, available at https://borgaa.com/ which includes a hearing test and monthly professional one-to-one frequency measurements and is conducted 100% online.

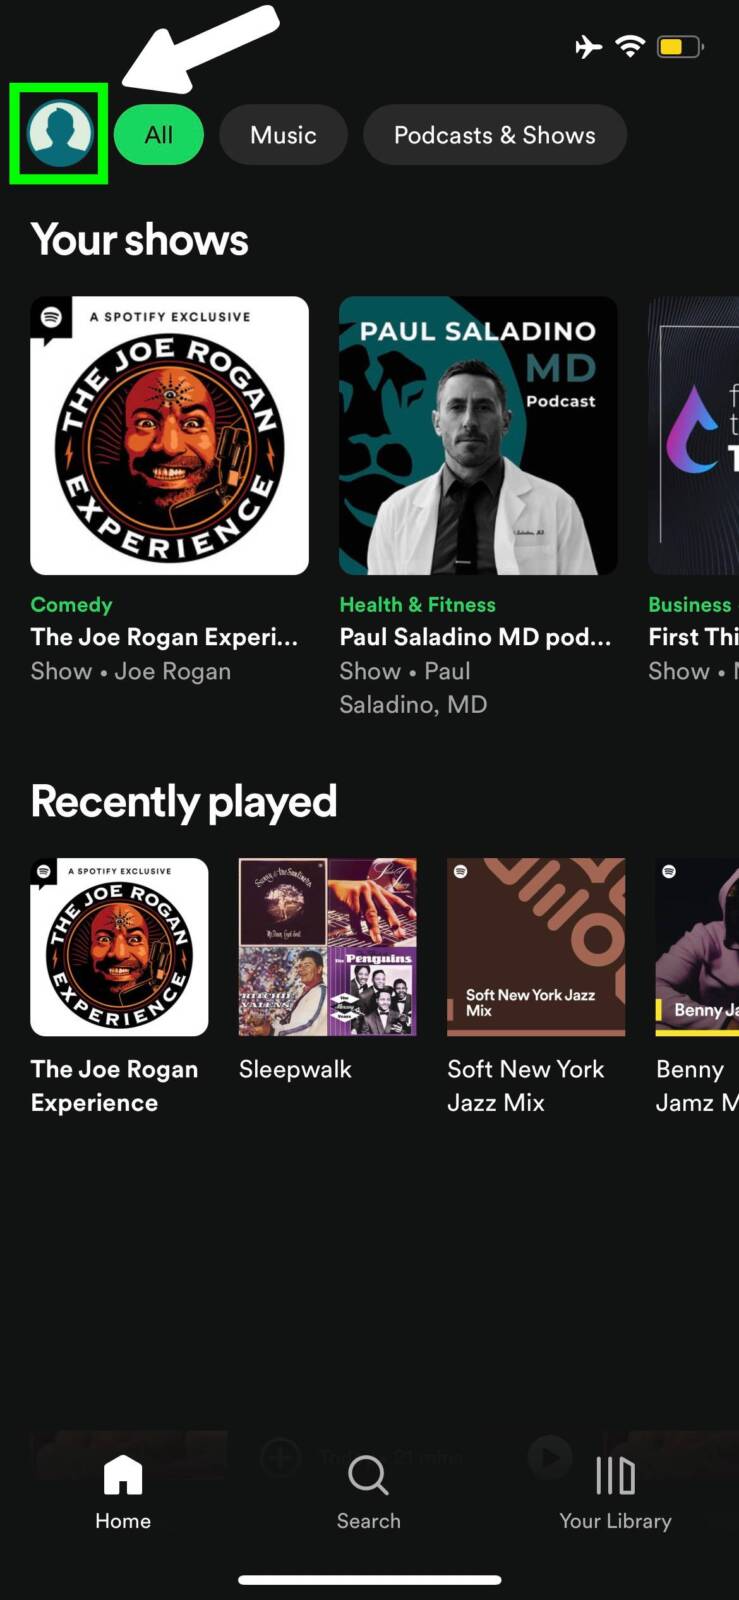
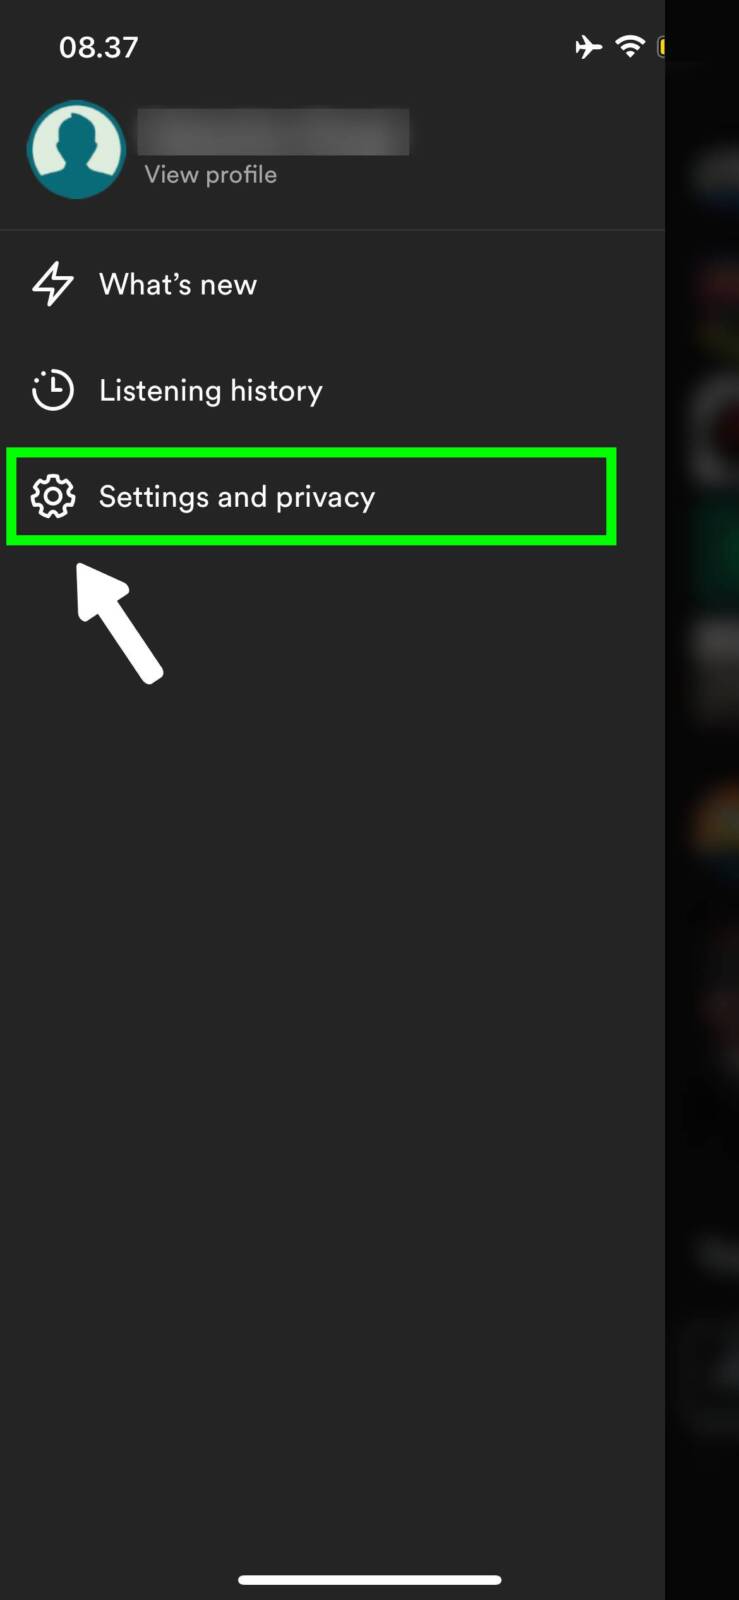
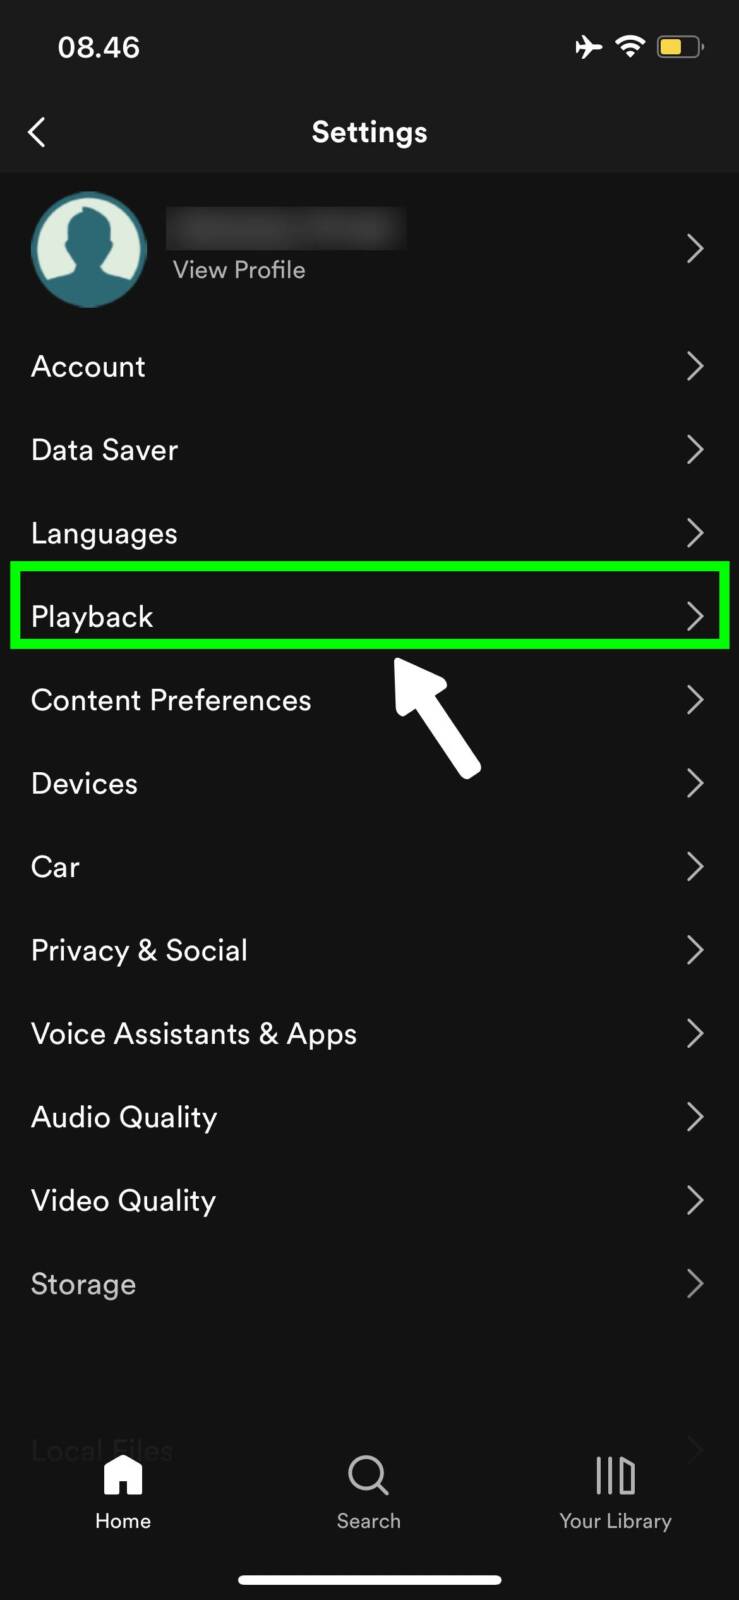
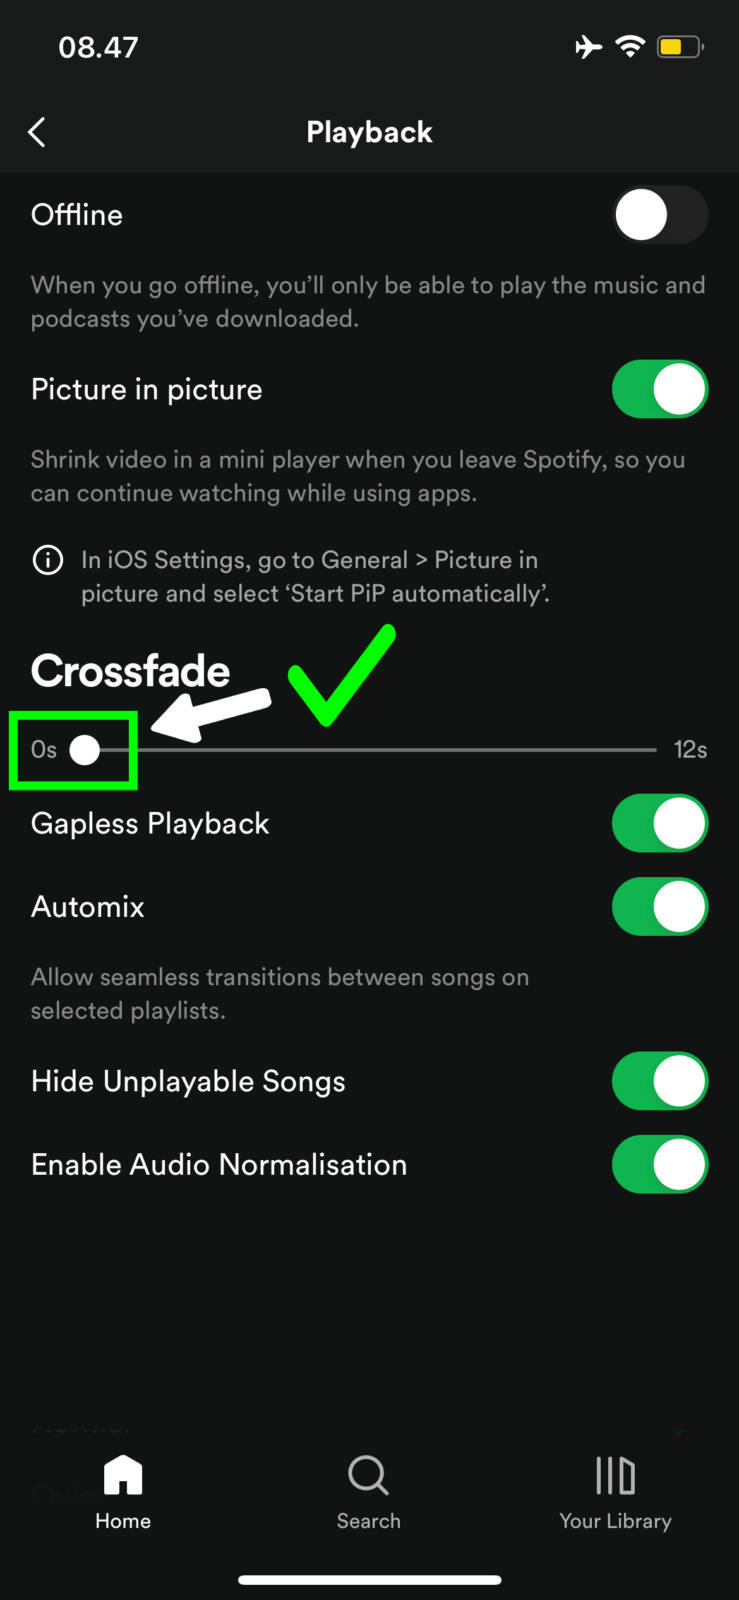
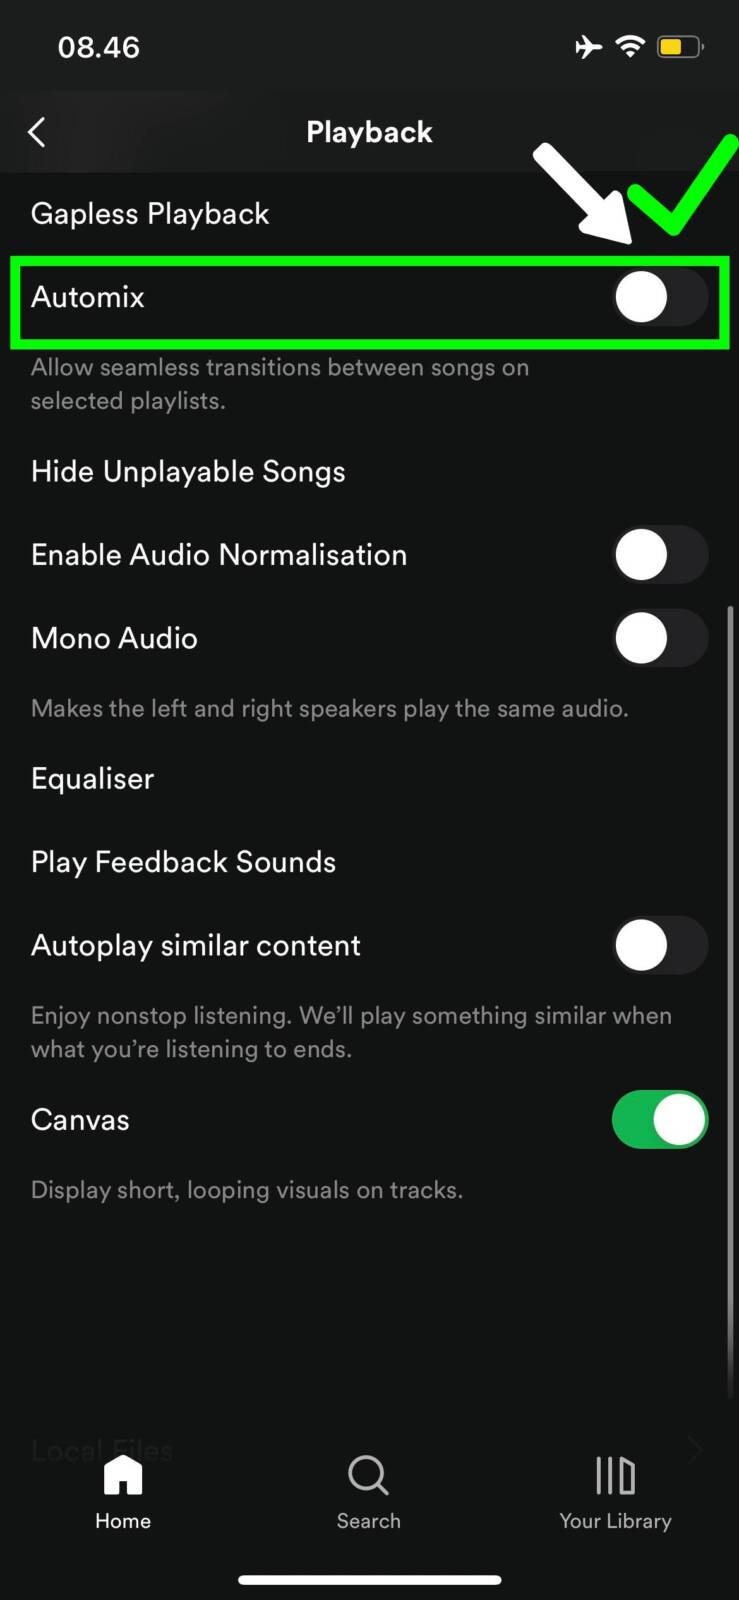
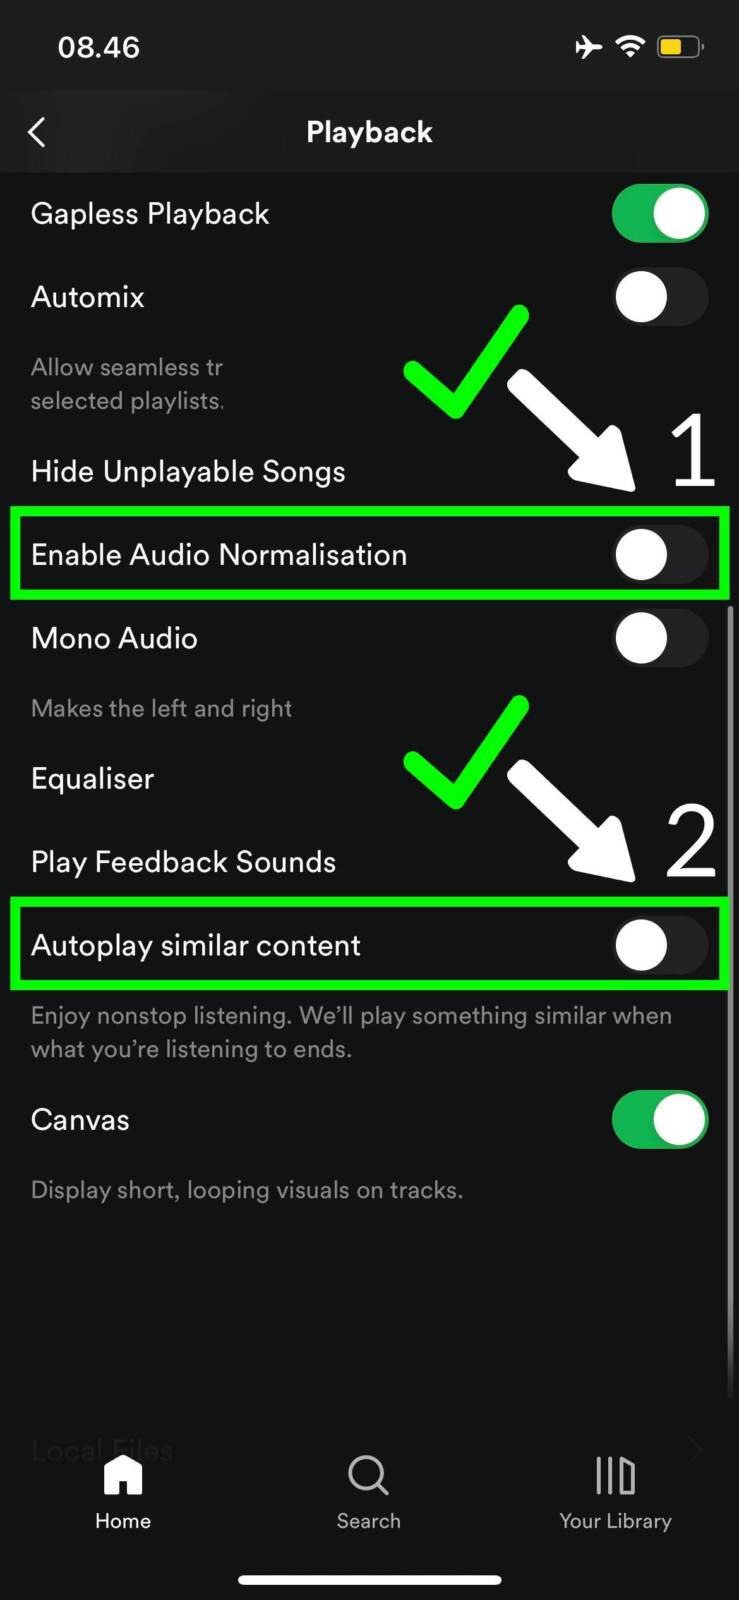
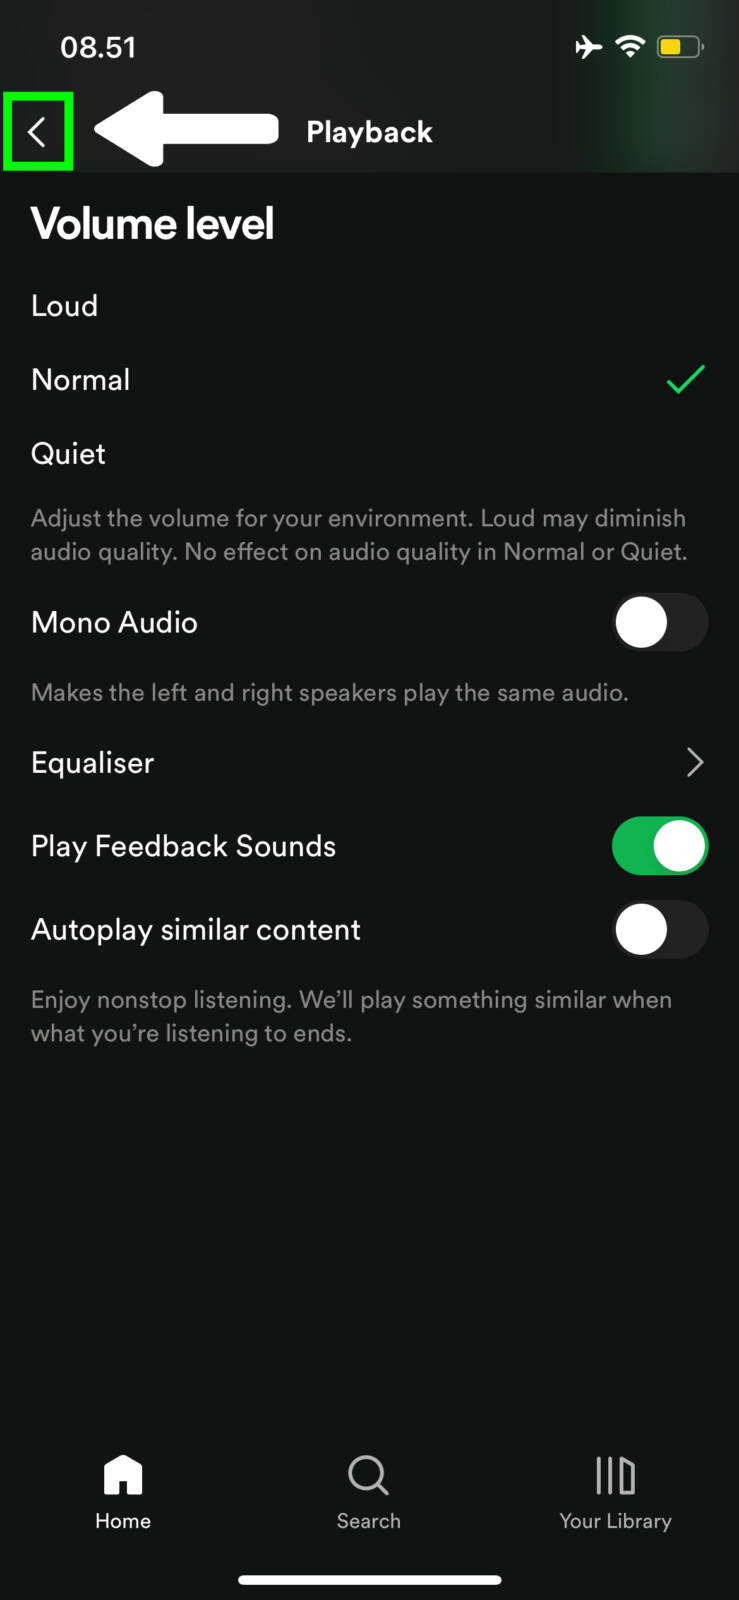
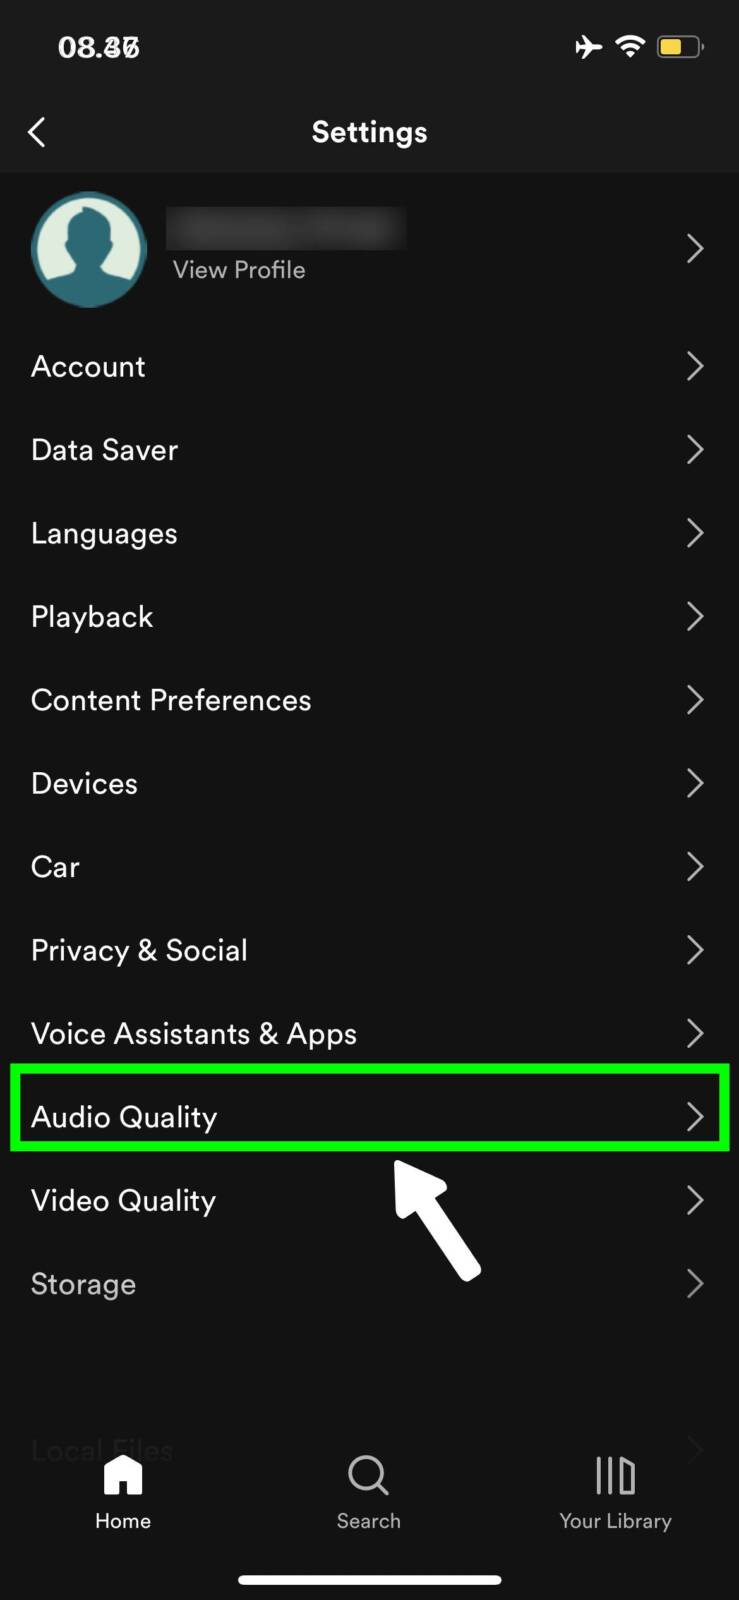
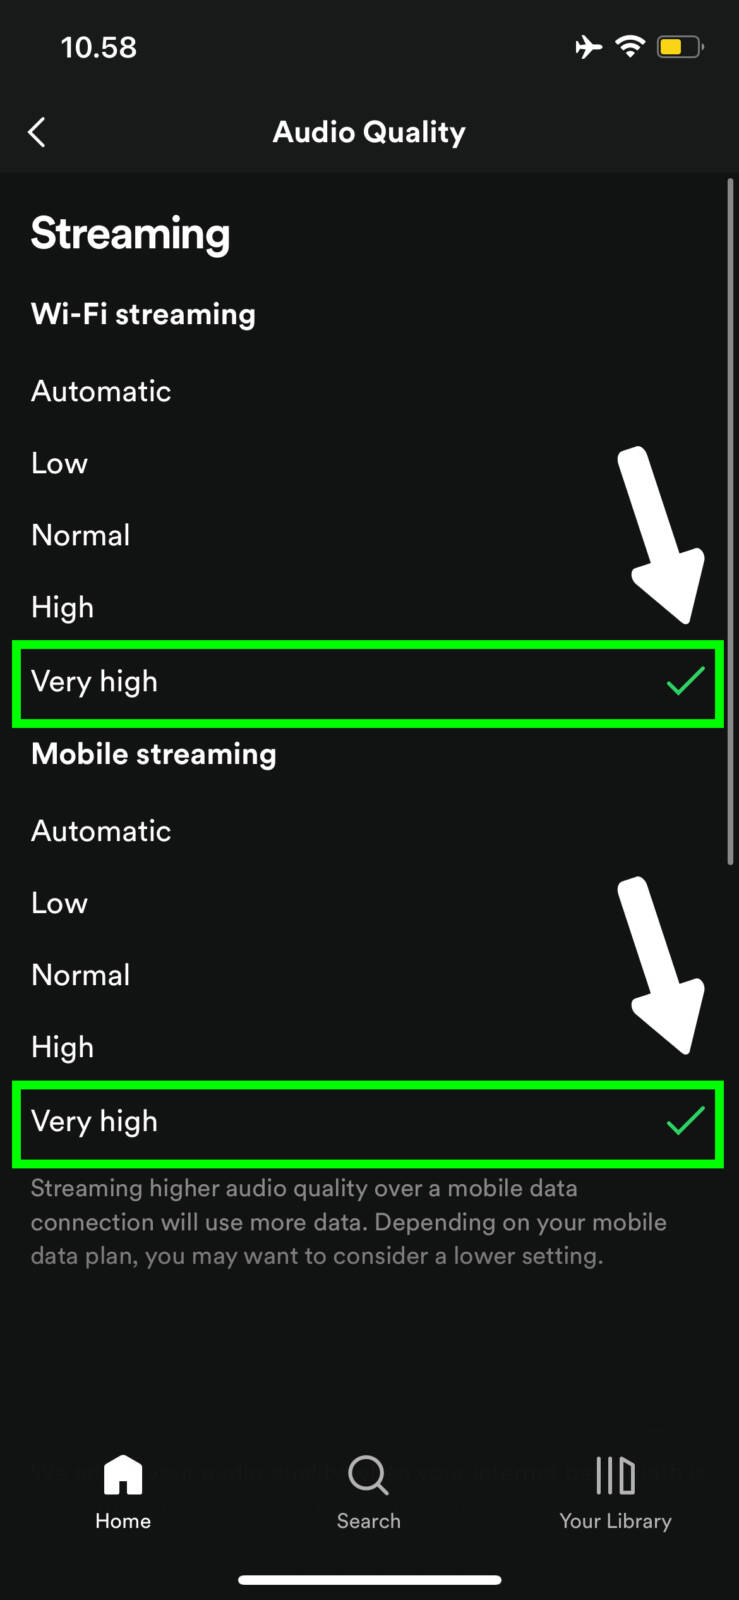
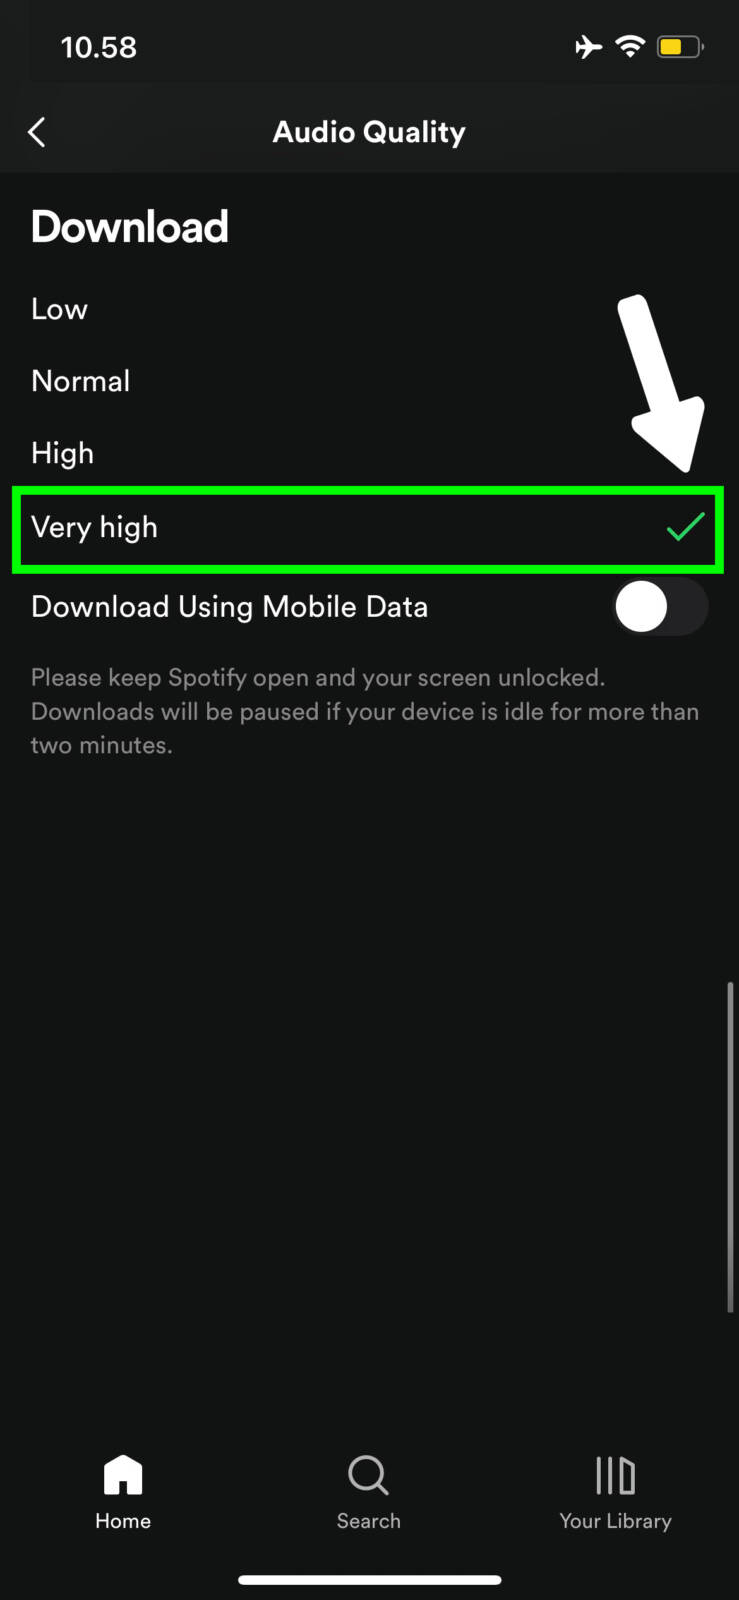
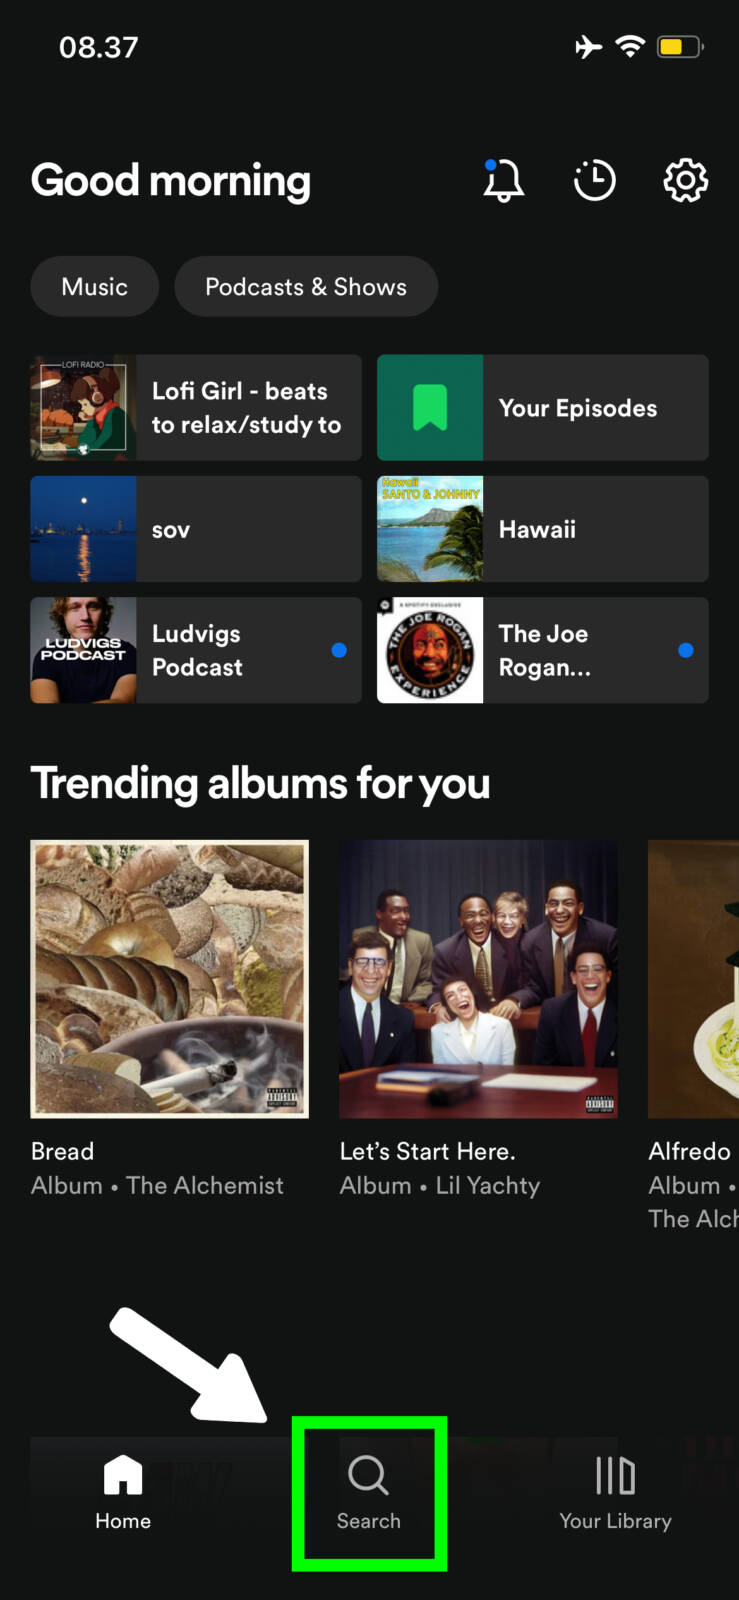
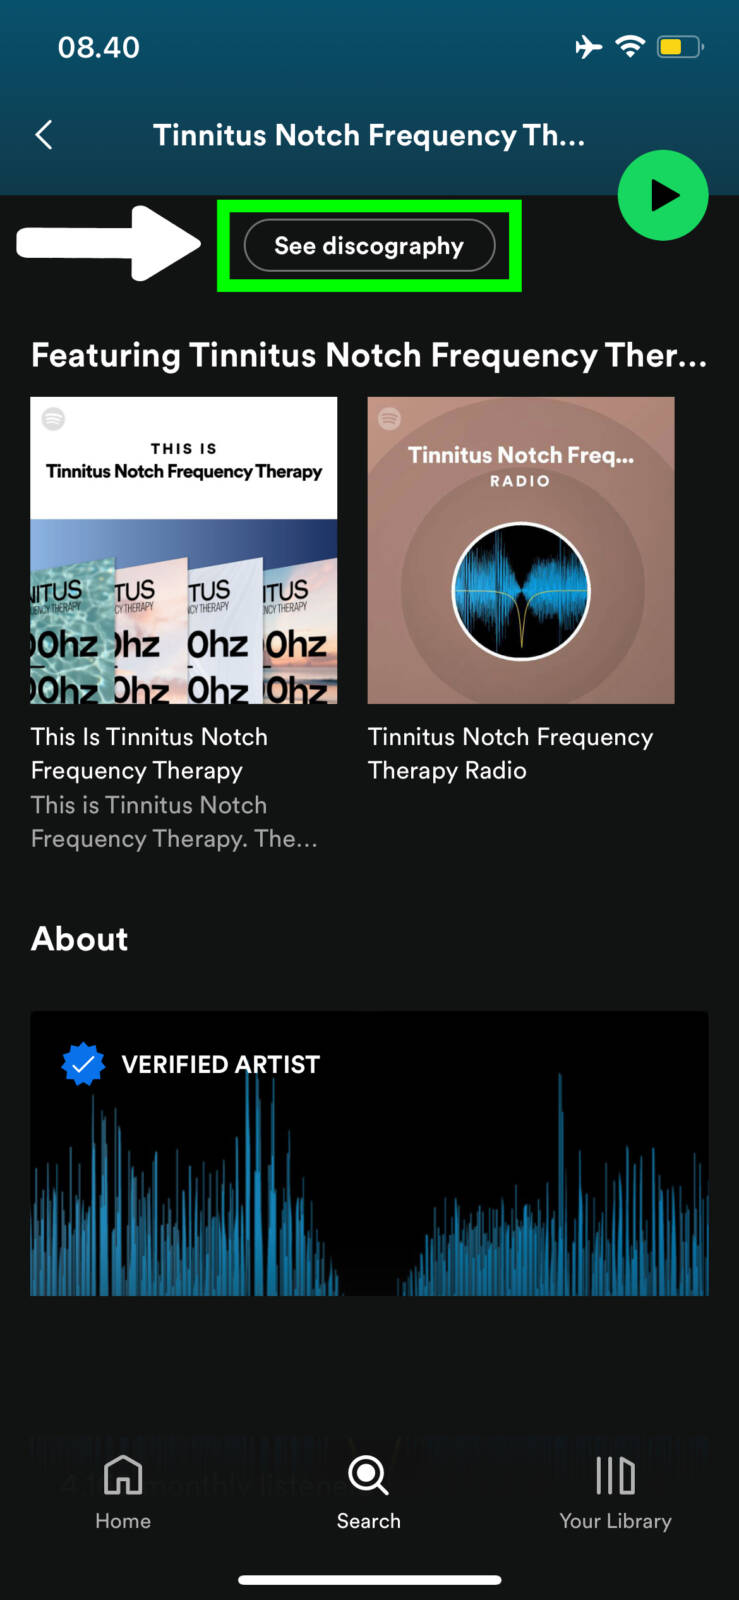
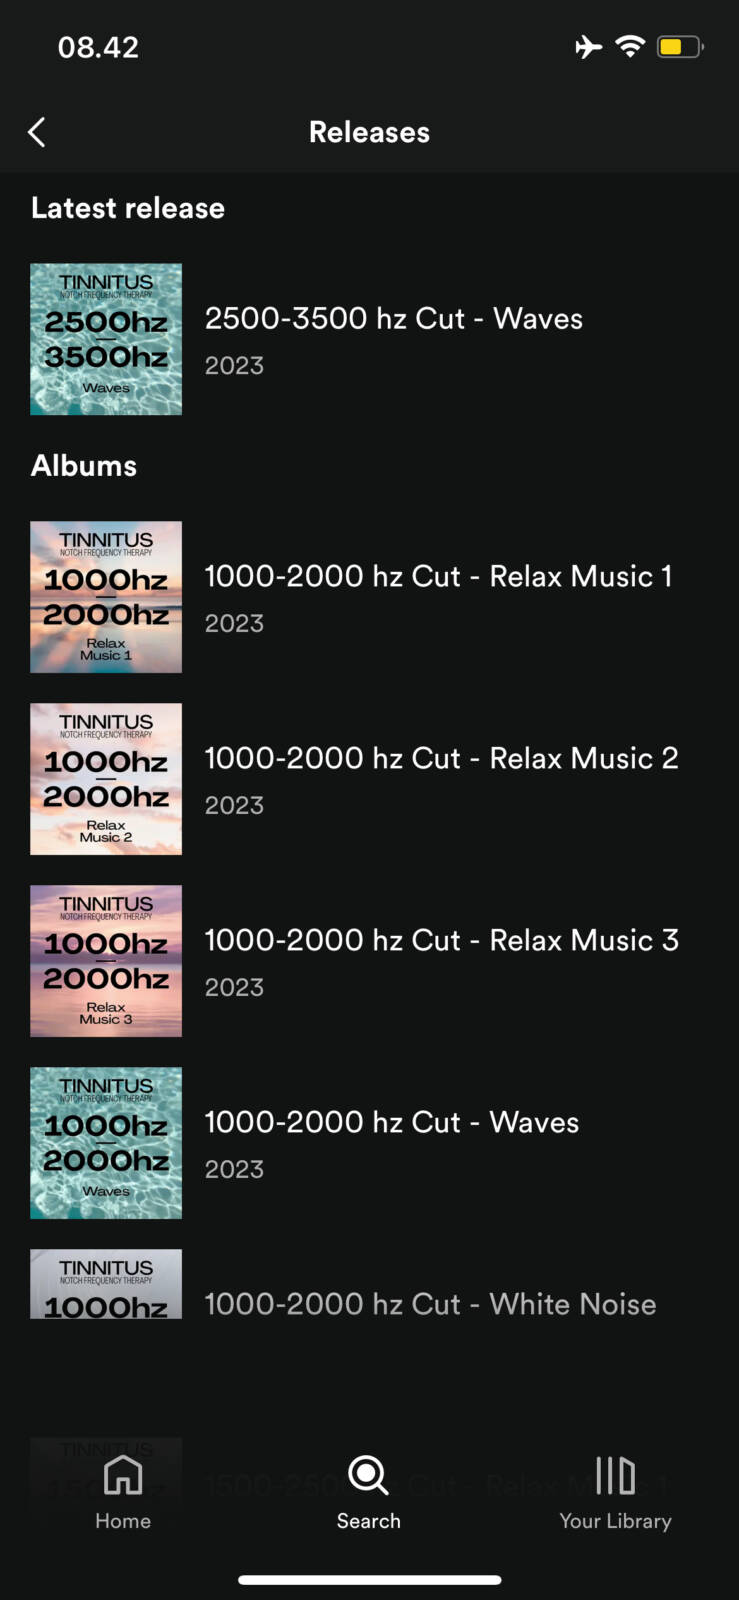
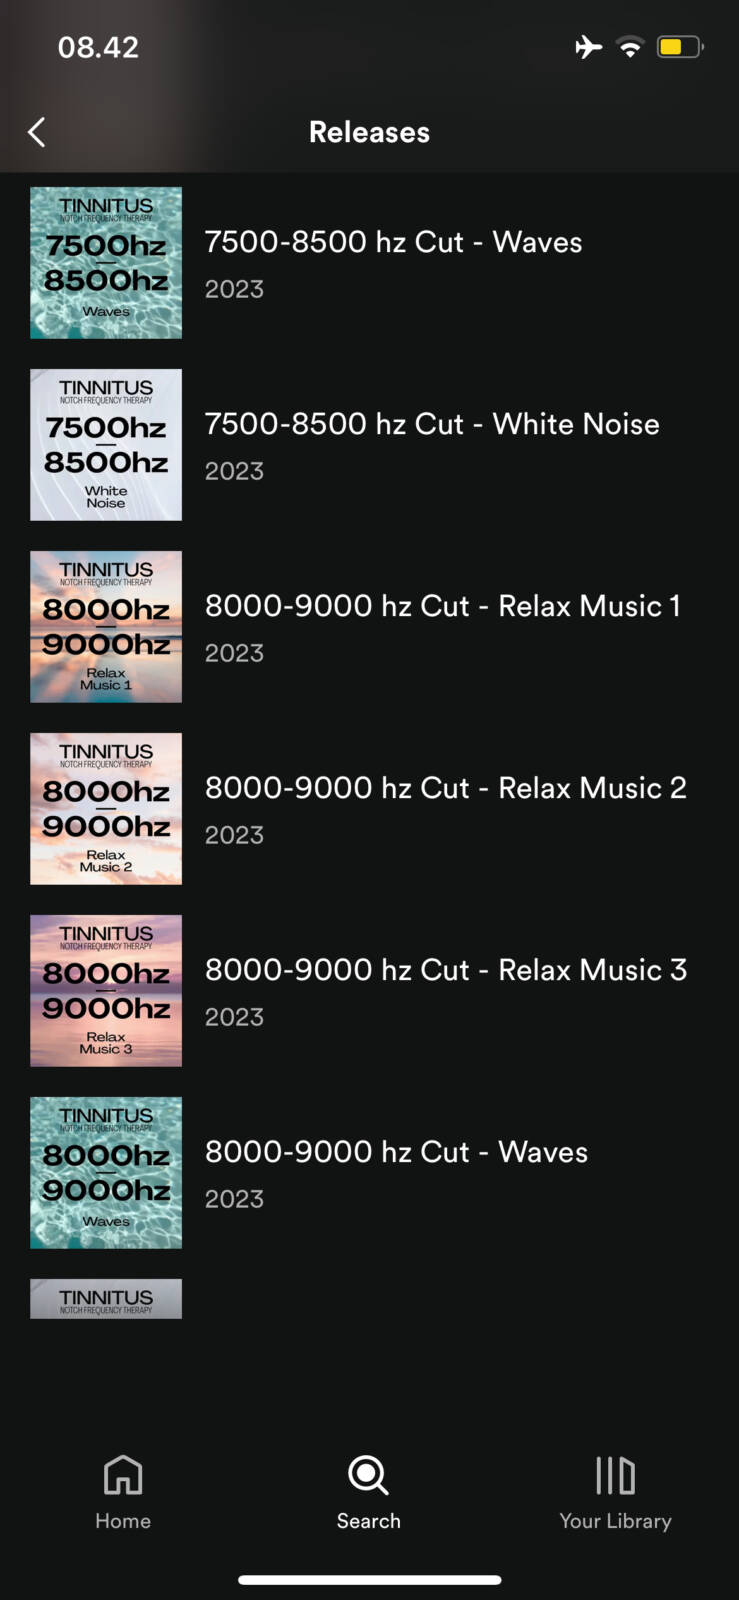
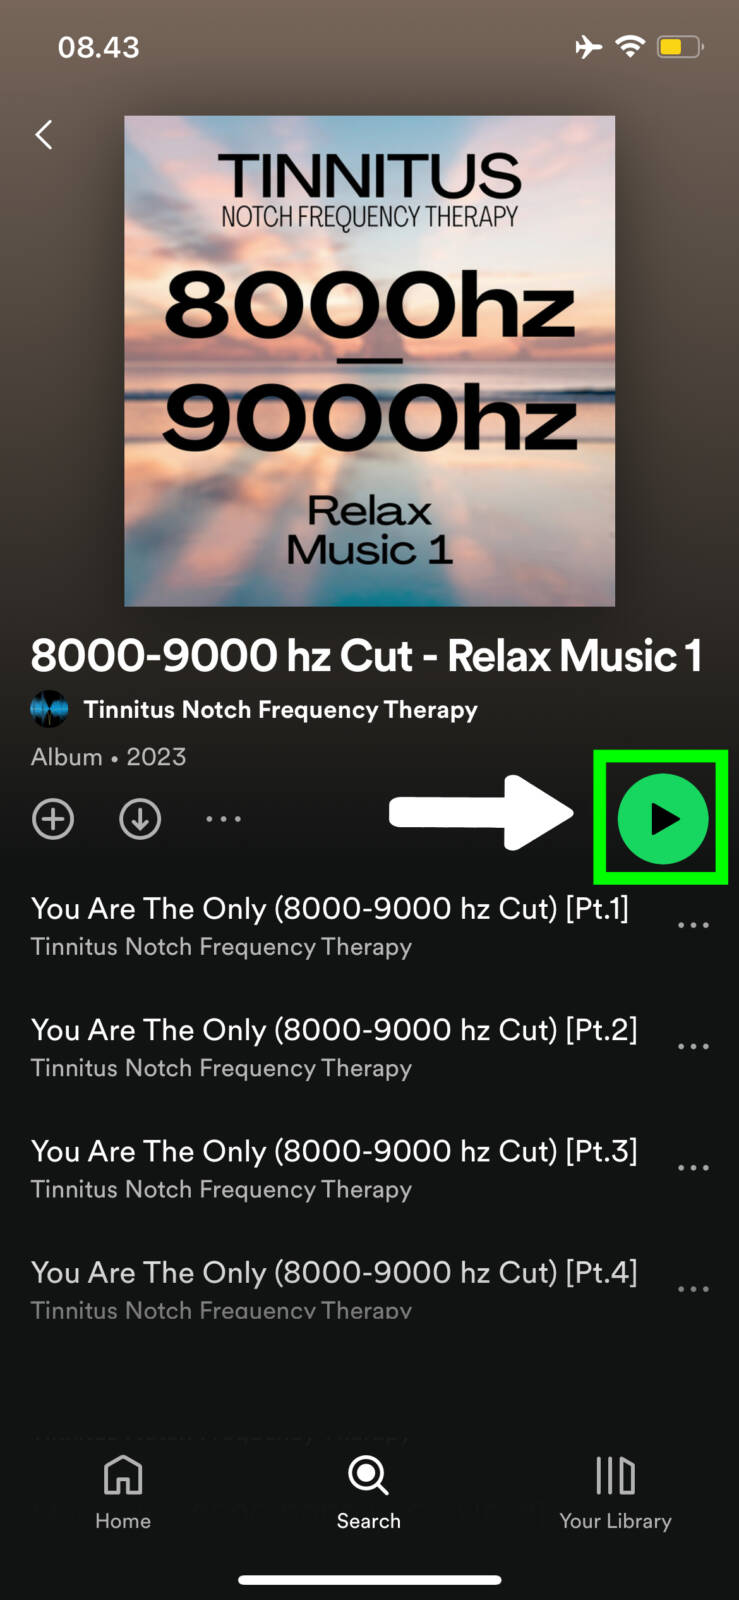
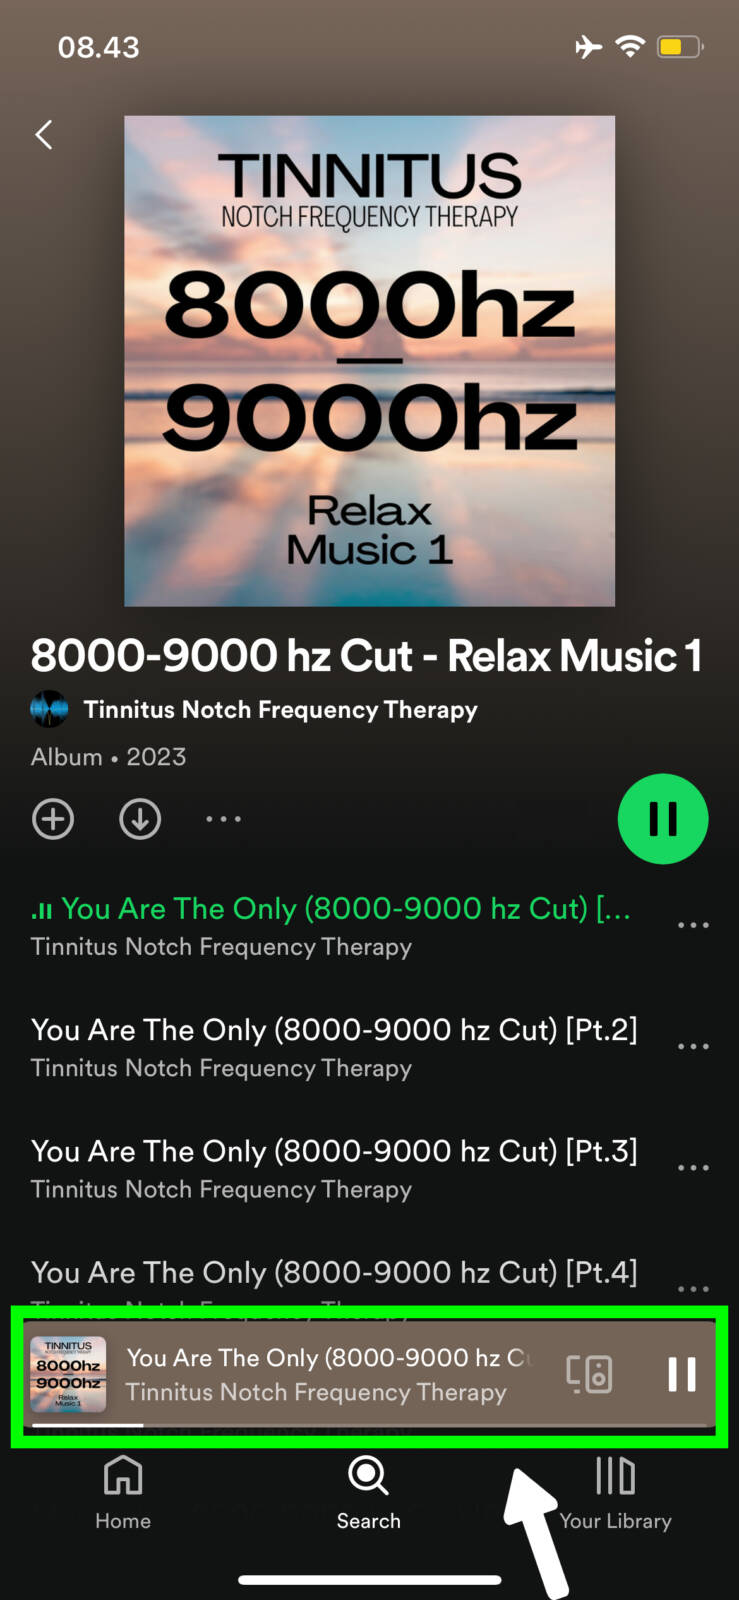
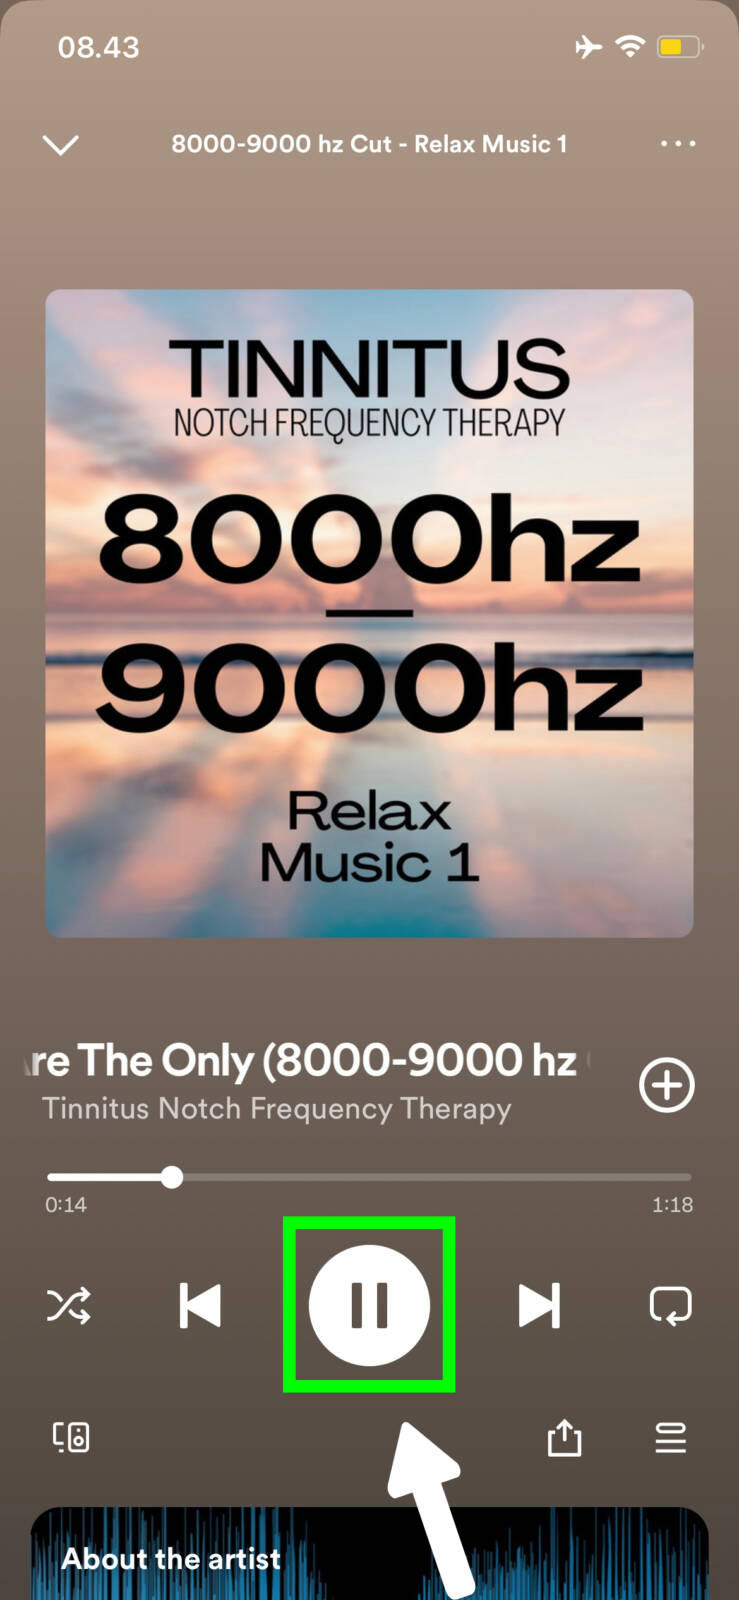
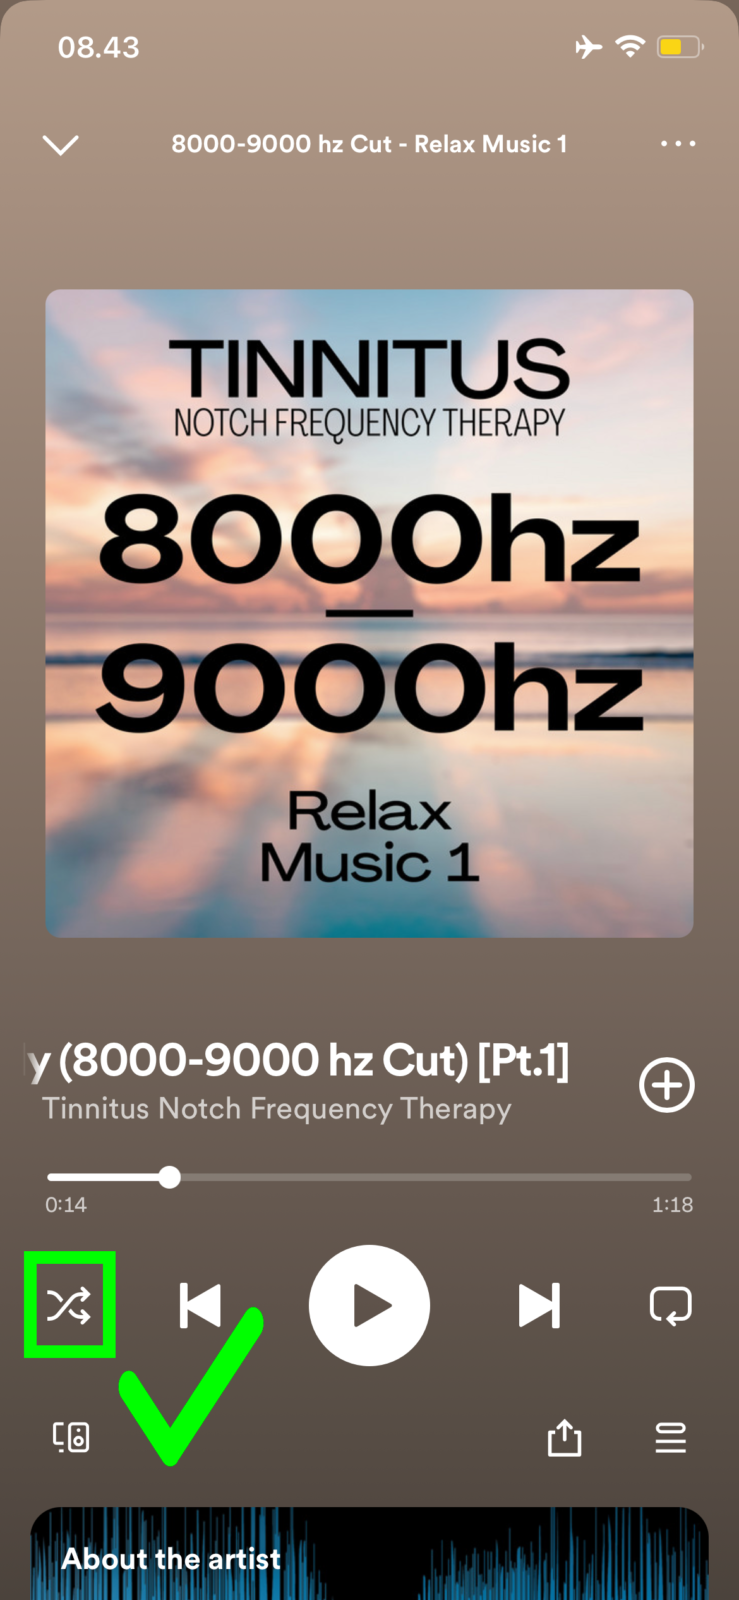
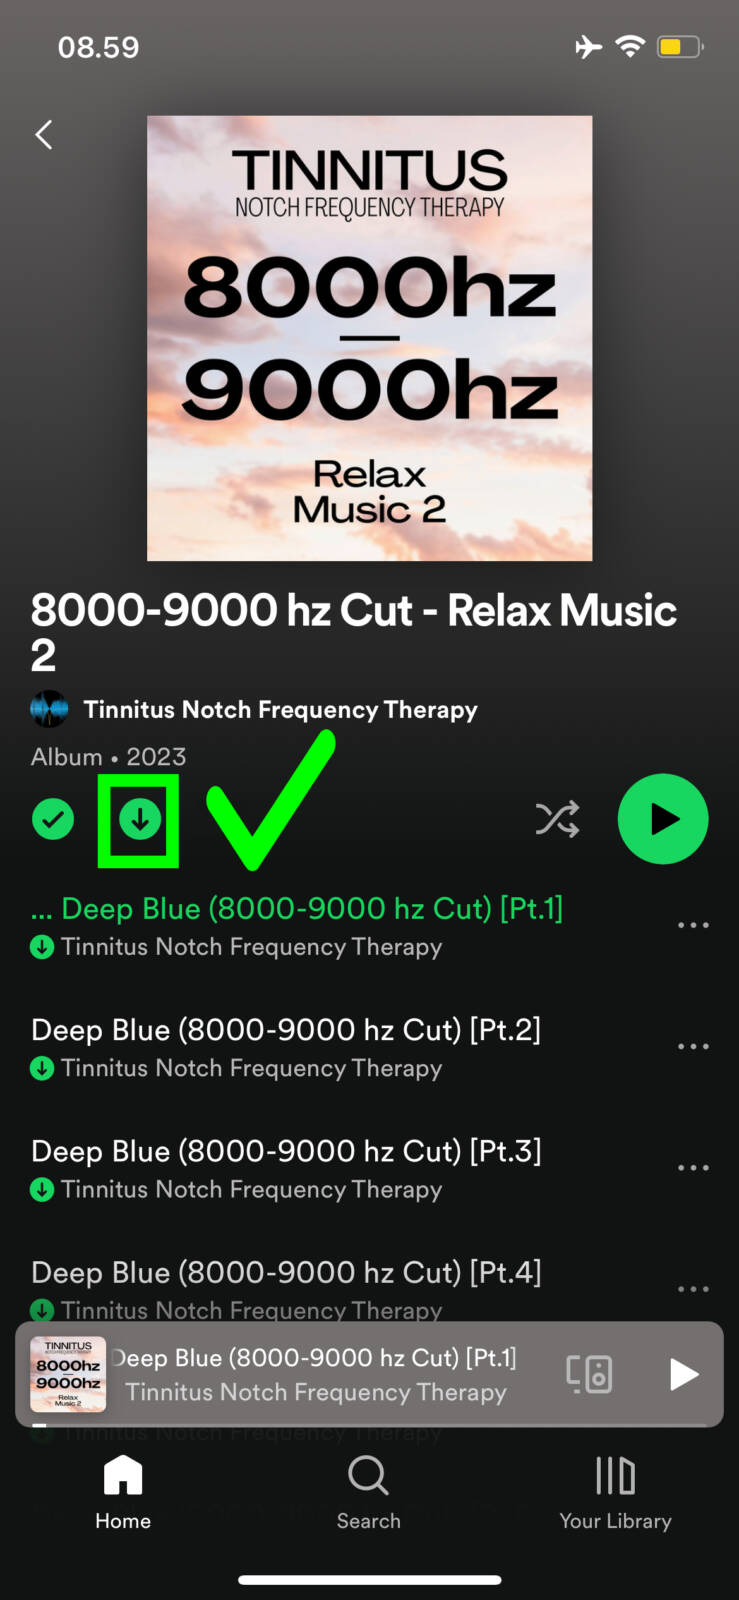
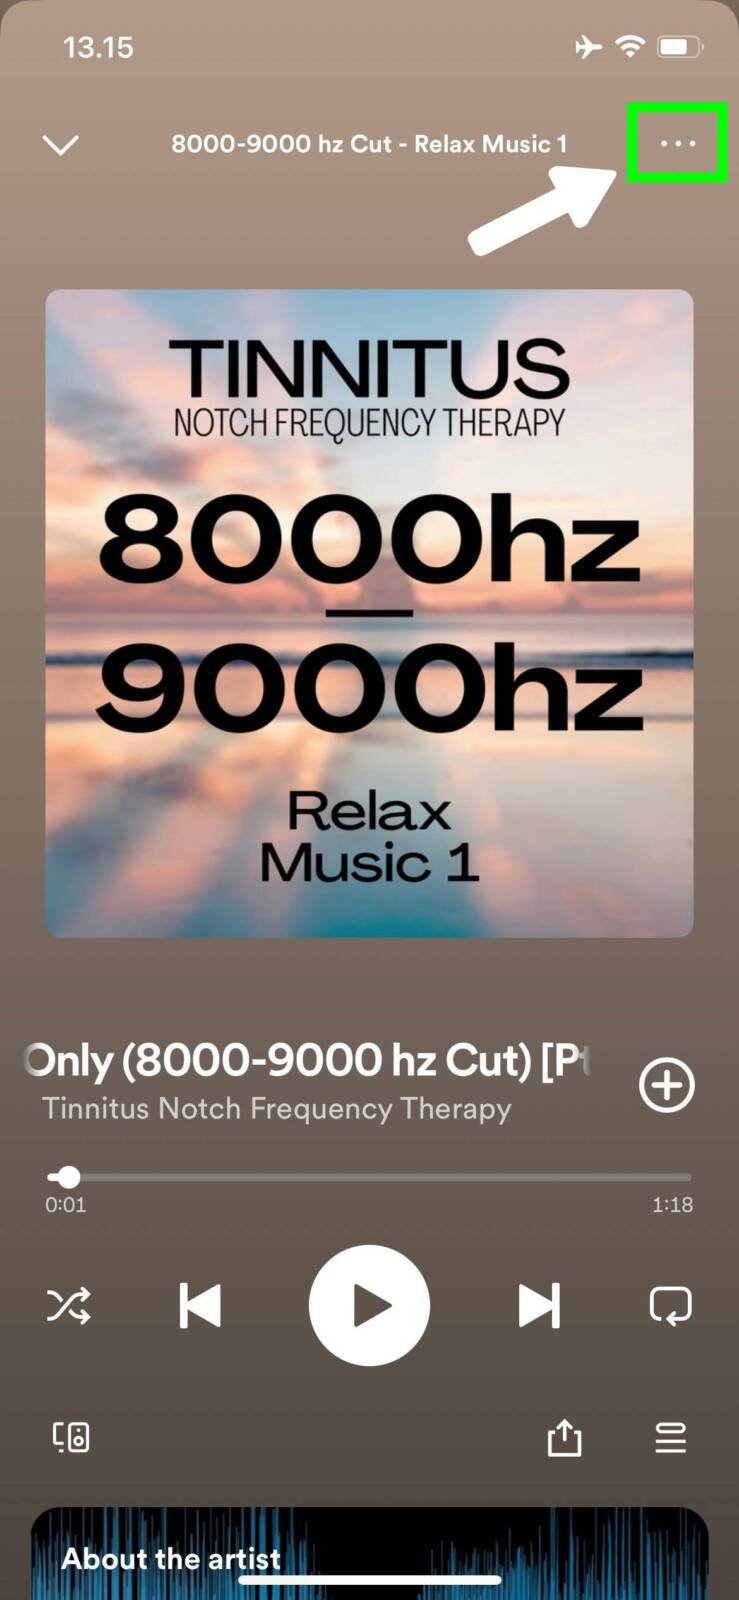
Once you have had your treatment professionally measured, you are now ready to begin. The process depends on whether you are using the Spotify app on a phone or a computer. Select here:

How to listen to Notch Frequency Therapy - Spotify on Phone

Table of Contents

1. Get your tinnitus frequency professionally measured

We strongly advise against attempting self-measurements, as it not only carries a higher risk of worsening your condition but also often leads to inaccurate outcomes, resulting in listening to the wrong therapy.

Instead you must have a plan for getting your frequency measured professionally on a monthly basis, as it’s expected to change over time as you treat yourself.

We recommend professional frequency measurements through one-to-one online consultations with the Borgaa Clinic. Their method, based on years of experience with thousands of measurements, ensures you listen to the tones for the shortest duration possible, avoiding sudden exposure to unpleasant piercing noise that could potentially worsen your condition.

Borgaa’s one-year Notch Frequency Therapy package (7.500 DKK) includes hearing tests and monthly follow-up consultations with measurements so that your therapy will be adapted, as your frequency will likely decrease over time.

Get in touch with the clinic at https://borgaa.com/ to get started with the online treatment course. All you need is a computer with a Wi-Fi connection and a pair of headphones.

2. Configure the right settings

2.1) Open the Spotify app on your iPhone and press your round Profile icon in the upper left corner.

2.2) Press Settings and privacy.

2.3) Press Playback

2.4) Make sure Crossfade is set to 0 seconds

2.5) Make sure Automix is disabled as shown in the picture.

2.6) Scroll further down, and make sure Enable Audio Normalisation and is disabled as shown in the picture.

2.7) Make sure Auoplay similar content is disabled as shown in the picture.

2.8) Go back to Settings.

2.9) Choose Audio Quality.

2.10) Make sure the audio quality for Wi-Fi streaming is set to Very high, as shown in the picture.

2.11) Make sure the audio quality for Mobile streaming is set to Very high as shown in the picture.

2.12) Make sure the audio quality for Download is set to Very high as shown in the picure.

3. Find artist page and material

3.1) Press the Search button at the bottom of your home page.

3.2) In the giant Search bar at the top, type in: “tinnitus notch frecuency therapy”.

3.3) The artist page with this logo will show up as the Top result. Now click on it.

3.4) On the artist page, scroll down, and click on the See discography button.

3.5) Choose an Album adapted to the frequency range in where your individual tinnitus frequency falls into.

If you are unsure about your frequency, check out step 1 in this guide, and get the professional Notch Frequency Therapy treatment package at https://borgaa.com/.

If you’ve already started the treatment course at Borgaa, or have another plan for regular professional frequency measurements, and are aware of your current frequency, you are ready to listen. 

Click on an album of your choice that’s tailored to the frequency range in which your individual tinnitus frequency falls into; this range is clearly indicated in the title and cover of each album. You’ll find a diverse selection of therapy, including various forms of relaxing music, calming wave sounds, and soothing white noise. Select what feels most comfortable for you, and feel free to switch between them for variety.

4. Customize playbar buttons

4.1) Click the Play Button on the album you chose. 

4.2) The track you are listening to will now be displayed in the Play bar at the bottom of your screen. Now click on the Play bar

4.3) Pause the track again, so that you can configure the play buttons

4.4) Make sure the Shuffle button is deactivated, by making sure it is gray/white, as showcased in the picture.

4.5) Configure the Loop button to your preferance based on the descriptions below:

5. Download material

You can also download albums that you want to listen to. We recommend doing so, since that way, you’ll always have your favorite albums easily accessible at anytime wherever you are.

5.1) On the page of the Album you chose, the circle with an arrow pointing downwards under the album cover is the Download button. Click on it to begin the download, and observe it turning into a spinning circle, which means your download is in process.

5.2) Give it a few minutes to finish the download. When the download is complete, the download button will turn green, as showed in the picture below:

5.3) Navigate to Your library by clicking the button to the right in the bottom menu. Here you will find all your downloaded albums.

6. Set a Sleep Timer

If you are one of the many listeners who enjoy listening to your Notch Frequency Therapy before sleeping, Spotify’s built-in sleep timer can be extremely useful for you.

With the sleep timer, you’re in complete control. You can adjust the duration of your therapy session to match your personal needs.

No more waking up in the middle of the night to turn off the music, because you fell asleep before turning it off. And no more counting minutes, struggling to stay awake to turn off the music manually. — simply set your timer, lay back in your cozy bed, let the therapy play, and don’t worry about falling asleep.

6.1) Start playing an album of your choice

6.2) The track you are listening to will now be displayed in the Play bar at the bottom of your screen. Now click on it.

6.3) Now you will see the track in full screen. Click the three red dots in the upper right corner.

6.4) Scroll all the way down to the bottom until you see the Sleep timer button. Click on it.

6.5) Choose the desired time duration for how long you want the therapy to play, before the timer automatically switches it off. In this case in the pictures, the listener is choosing 45 minutes.

6.6) The sleep timer is now set. Continue the album, lay back, enjoy your therapy session, and have an amazing night’s sleep.

Go to Top